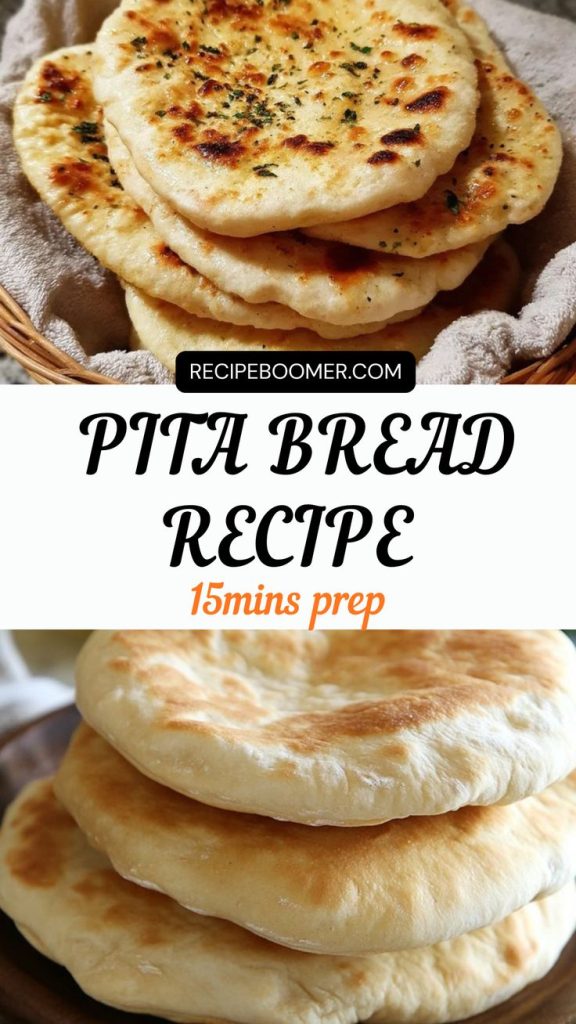
Delicious Pita Bread Recipe: Soft, Puffy, and Perfect Every Time
Let’s be honest—store-bought pita bread is fine… until you actually make it at home.
Then suddenly, that pre-packaged stuff tastes like cardboard pretending to be bread.
Homemade pita, on the other hand, is soft, chewy, and slightly smoky, with that perfect pocket waiting to be stuffed with something magical (hello, falafel).
And guess what? It’s not nearly as intimidating as people make it out to be.
So today, I’m walking you through my foolproof delicious pita bread recipe that never fails.
You don’t need fancy ingredients, and you definitely don’t need to be a pro baker.
All you need is a bit of patience, a hot pan (or oven), and the willingness to watch dough puff up like a magic balloon.
Why You’ll Love This Pita Bread Recipe
If you’ve ever bitten into a warm, freshly baked pita, you already know it’s a vibe. But here’s exactly why this recipe stands out:
- It’s easy. No complicated kneading rituals or expensive mixers.
- It’s soft and fluffy inside, with a perfect chew.
- It puffs beautifully—yes, that iconic pocket is all yours.
- You can cook it on the stovetop or in the oven. Choose your adventure.
- It freezes like a dream. So you can make a big batch and have fresh pita on demand.
Honestly, once you make your own pita, you’ll never go back.
read also: The Best Broccoli Salad Recipe
Ever wondered why homemade bread just feels better? It’s because you made it with your own hands (and maybe a little chaos).
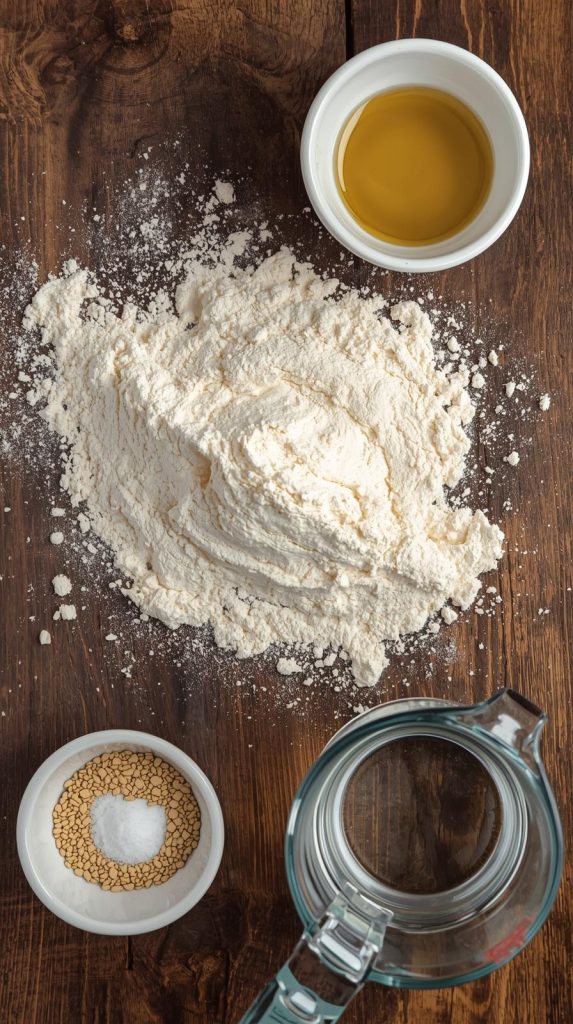
Ingredients You’ll Need
Let’s get into the simple goodness. You probably already have these in your pantry:
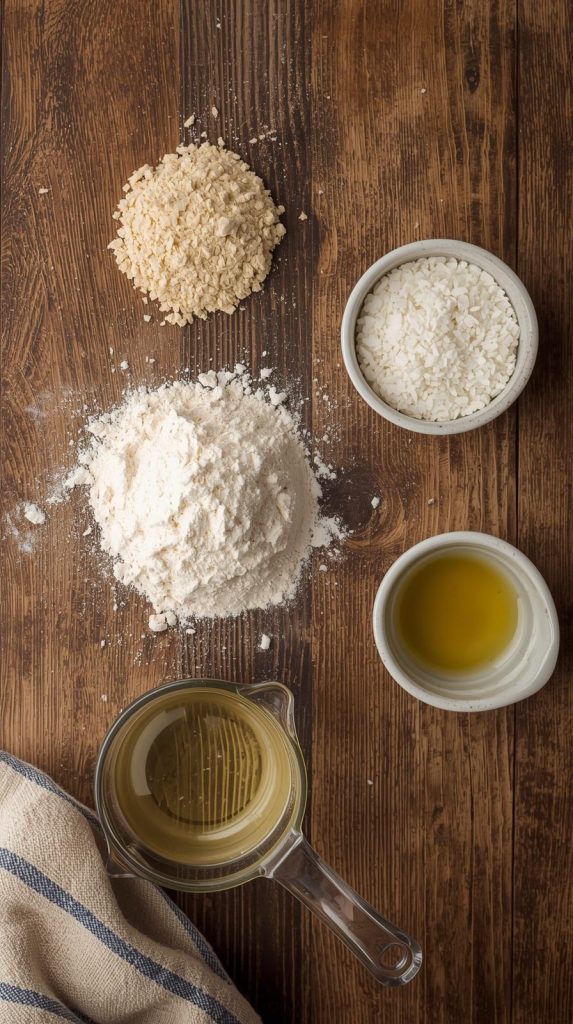
For the dough:
- 3 cups all-purpose flour (you can swap 1 cup for whole wheat if you like a nuttier flavor)
- 2 teaspoons instant yeast
- 1 teaspoon sugar
- 1 teaspoon salt
- 1 ¼ cups warm water (around 100°F / 38°C)
- 2 tablespoons olive oil
Optional add-ins:
- A sprinkle of garlic powder for flavor
- A touch of honey for extra softness
FYI, the key to perfect pita bread isn’t in fancy ingredients—it’s in temperature and timing. (And a dash of patience, but don’t worry, I’ve got your back.)
Step-by-Step: How to Make Perfect Pita Bread
1. Activate the Yeast
In a large bowl, mix warm water, sugar, and yeast. Let it sit for about 5–10 minutes until it starts to foam. That’s your yeast saying, “Hey, I’m alive!”
Pro tip: If your yeast doesn’t bubble up, toss it. Dead yeast = sad, flat pita.
2. Mix the Dough
Add flour, salt, and olive oil to the yeast mixture. Mix with a wooden spoon until a shaggy dough forms.
Then, knead it by hand (or with a dough hook) for about 8–10 minutes until smooth and elastic.
If the dough feels too sticky, sprinkle in a bit more flour. Too dry? Add a splash of warm water. Bread-making is about feel, not perfection.
3. Let It Rise
Place the dough in a lightly oiled bowl, cover it with a damp cloth, and let it rise for 1–1.5 hours in a warm spot. It should double in size.
Ever wondered why dough rising feels like magic? It’s literally millions of yeast cells partying and producing CO₂. Science is delicious sometimes.
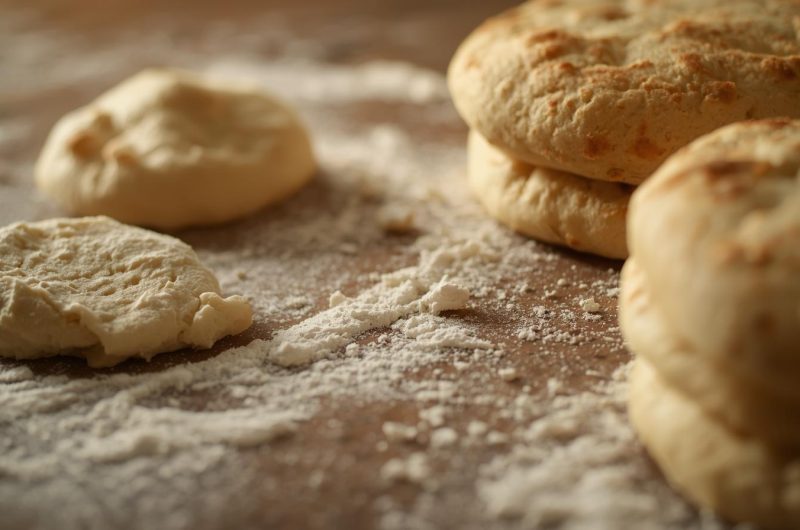
4. Shape the Pitas
Once risen, punch down the dough gently (yes, punch it—it’s therapeutic). Divide it into 8 equal balls.
Roll each one into a circle about ¼ inch thick. Don’t go thinner or it won’t puff properly.
Tip: Keep the circles covered with a clean towel so they don’t dry out.
5. Cook Time: Two Options
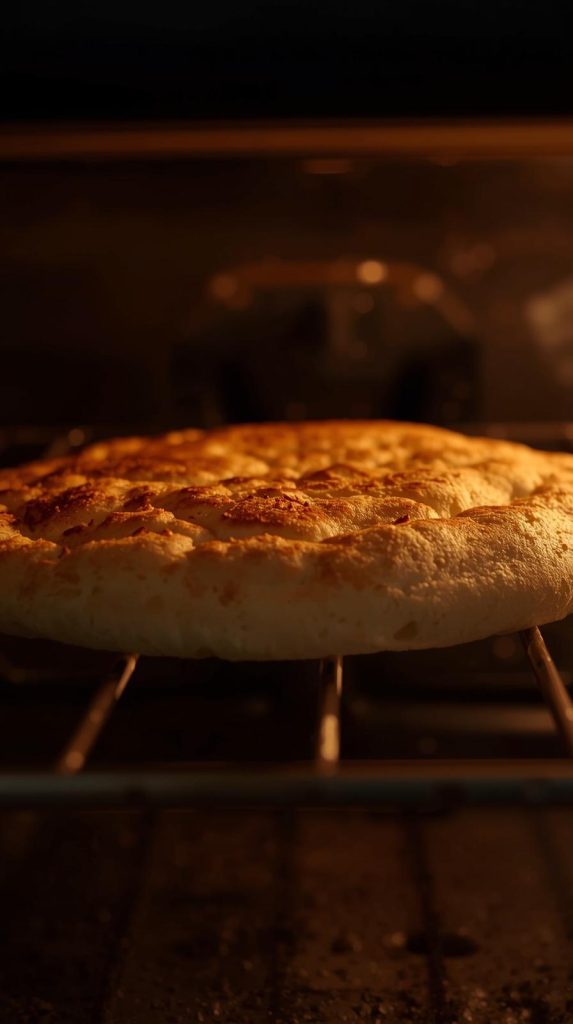
Option 1: Oven Method (for perfect pockets)
- Preheat your oven to 475°F (245°C).
- Place a baking stone or heavy baking sheet inside while preheating.
- Once hot, place 2–3 rolled pitas on it and bake for 3 minutes.
- Watch them puff up dramatically—it’s honestly kinda mesmerizing.
They’ll inflate into golden balloons, then deflate slightly when you pull them out. Congrats, you just made authentic pita pockets!
Option 2: Stovetop Method (for soft, charred flavor)
- Heat a cast-iron skillet or non-stick pan over medium-high heat.
- Place a pita on the pan—no oil needed.
- Cook for 1 minute per side, flipping when bubbles start forming.
This version gives you that slightly smoky, blistered edge that tastes like something straight from a Middle Eastern bakery.
Secrets to Perfectly Puffy Pita Bread
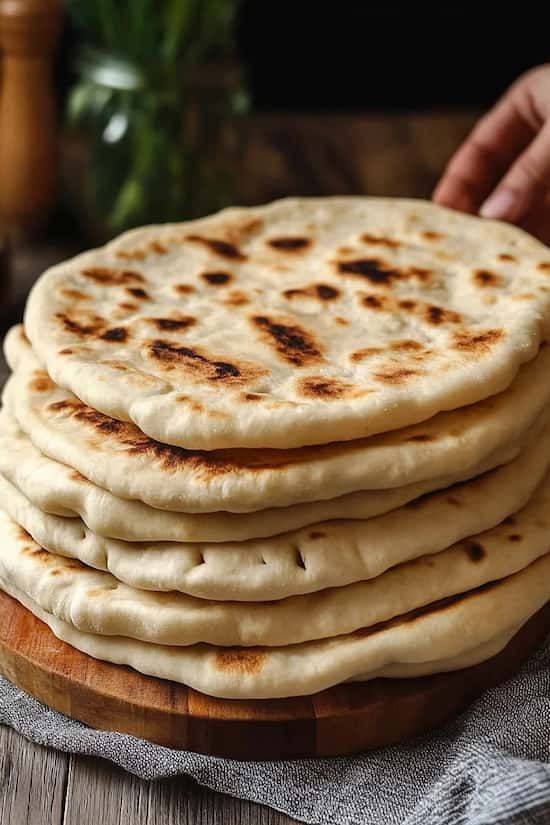
Want that iconic puff every time? Here’s what you must remember:
- Hot, hot, HOT surface. The temperature difference between the dough and the pan/oven causes the steam to expand and form the pocket.
- Right thickness. Too thin = crispy flatbread. Too thick = dense bread.
- Let the dough rest. Overworked dough won’t puff as well.
- Don’t overbake. You want soft, not crunchy.
And if they don’t puff one time? Don’t panic. Flat pitas are still ridiculously good as wraps or pizzas. No losses here.
Flavor Upgrades (Because Why Not?)
Sure, plain pita is classic—but you can totally jazz it up. Try these ideas next time:
- Garlic Butter Pita: Brush with melted butter, minced garlic, and parsley.
- Za’atar Pita: Mix olive oil with za’atar spice and brush before baking.
- Cheesy Pita: Sprinkle shredded mozzarella or feta on top before toasting.
- Sweet Pita: Drizzle with honey and cinnamon for a dessert twist.
Sometimes I make a batch of mini pitas and serve them as snacks with hummus or tzatziki. They disappear faster than I can blink.
What to Serve with Homemade Pita Bread
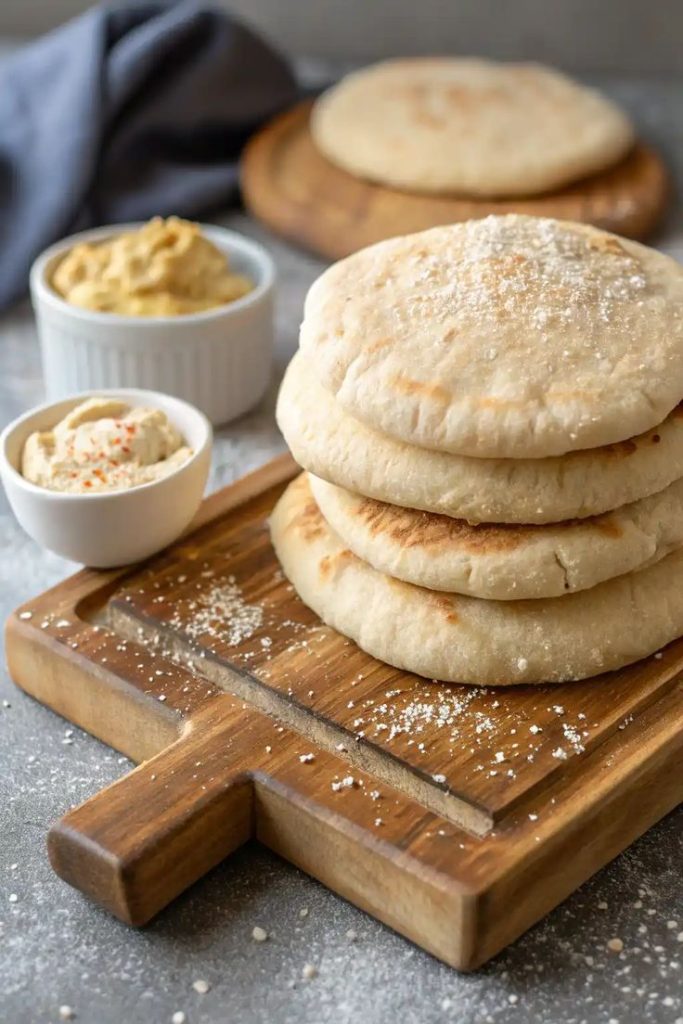
Homemade pita is the ultimate multitasker. Here’s how I love using it:
- Stuffed: Fill with falafel, chicken shawarma, or roasted veggies.
- Dipped: Pair with hummus, baba ganoush, or tzatziki.
- Topped: Use it as a base for quick pita pizzas (just add sauce, cheese, and toppings).
- Torn and Shared: Serve warm alongside soups or stews.
Ever tried dipping warm pita into olive oil and za’atar? If not—please do. Your taste buds will thank you later.
Storage Tips
Here’s how to keep your pita fresh and soft:
- At room temperature: Store in a ziplock bag or airtight container for up to 3 days.
- In the fridge: Keeps up to 5 days, but reheat before serving.
- In the freezer: Stack with parchment between each pita, wrap tightly, and freeze up to 2 months.
To reheat, wrap in a damp towel and microwave for 20 seconds—or warm in a skillet for a crisp edge.
Common Pita Problems (and How to Fix Them)
Because let’s be real—not every batch comes out picture-perfect. Here’s what might go wrong and how to fix it:
Problem 1: Pita didn’t puff.
- Surface wasn’t hot enough.
- Dough too thick or under-proofed.
Problem 2: Too dry or hard.
- Overbaked.
- Not enough moisture in the dough.
Problem 3: Burned edges.
- Heat too high. Try medium-high instead of max flame.
Bread-making is a learning curve. IMO, every “failed” pita still tastes amazing—it’s just a new version of delicious.
Quick FAQs About Homemade Pita Bread
Q: Can I make pita dough ahead of time?
A: Absolutely! Store it in the fridge for up to 24 hours before cooking. Just let it come to room temp first.
Q: Can I use whole wheat flour?
A: Yes! Replace up to half the flour with whole wheat for extra flavor and fiber.
Q: What if I don’t have yeast?
A: You can use baking powder for a quick flatbread, but it won’t have the same puff or flavor.
Q: Do I need a baking stone?
A: Nope! A heavy metal baking sheet works just fine.
Why Homemade Always Wins
Here’s the truth: homemade pita bread just hits different.
The smell that fills your kitchen, the way it puffs up like a miracle, the softness when you tear it open—it’s pure comfort food magic.
And honestly, making bread from scratch feels empowering. You realize how simple ingredients—flour, water, yeast—can turn into something incredible with a bit of love and heat.
Ever had one of those “wow, I made this?” moments? Yeah, pita bread will give you that.
Final Thoughts
So there you have it: a delicious pita bread recipe that’s soft, fluffy, and easier than you think.
Whether you’re stuffing it with juicy grilled chicken, dipping it in creamy hummus, or just devouring it warm with butter (no judgment), this recipe never disappoints.
Next time you walk past the sad store-bought pita section, just smile and keep walking—you’ve got the real deal waiting at home.
Now go roll, bake, and watch your kitchen turn into a mini Mediterranean bakery. You’ll thank yourself later.
Delicious Pita Bread Recipe: Soft, Puffy, and Perfect Every Time
4
servings30
minutes40
minutesIngredients
3 cups all-purpose flour (you can swap 1 cup for whole wheat if you like a nuttier flavor)
2 teaspoons instant yeast
1 teaspoon sugar
1 teaspoon salt
1 ¼ cups warm water (around 100°F / 38°C)
2 tablespoons olive oil
Directions
- Activate the Yeast In a large bowl, mix warm water, sugar, and yeast. Let it sit for about 5–10 minutes until it starts to foam. That’s your yeast saying, “Hey, I’m alive!”Pro tip: If your yeast doesn’t bubble up, toss it. Dead yeast = sad, flat pita.