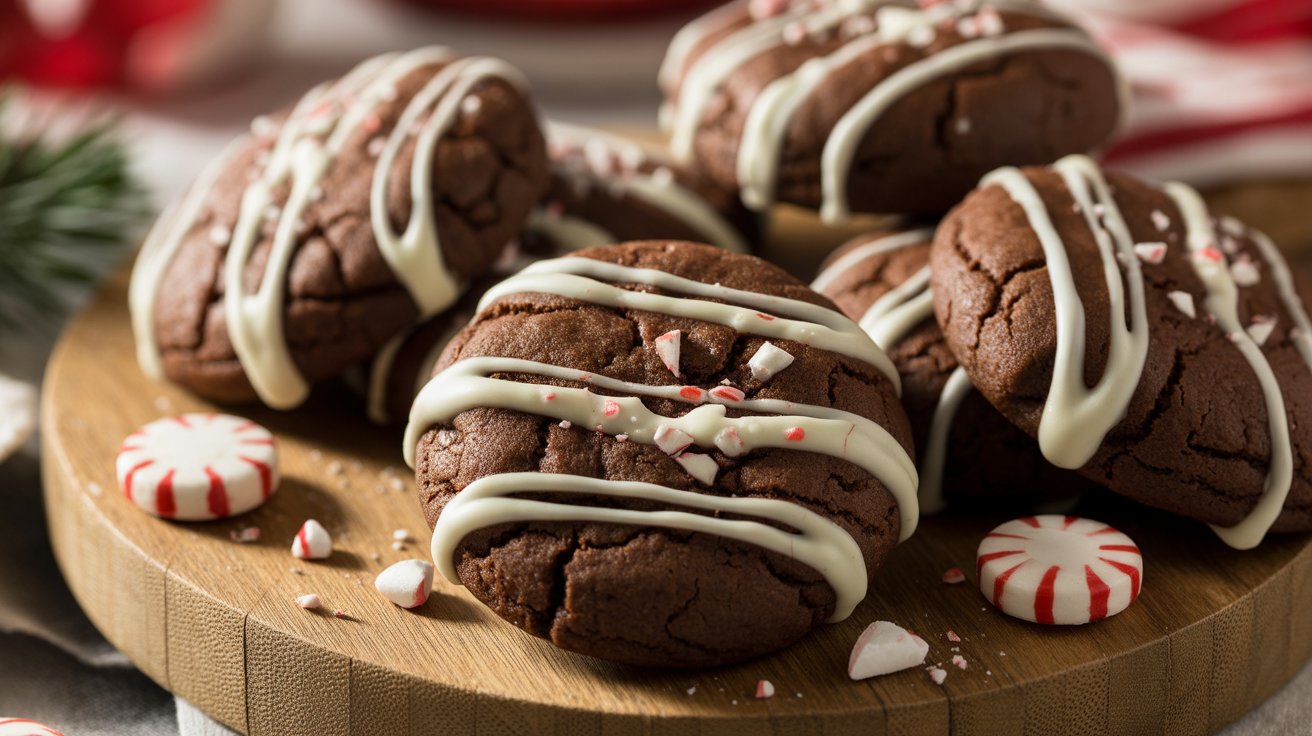
Gluten Free Chocolate Peppermint Cookies
If you love holiday baking but refuse to deal with complicated recipes, then these Gluten Free Chocolate Peppermint Cookies will feel like a tiny Christmas gift you gave yourself.
I created this recipe on a cold evening when I craved something chocolatey without wrestling with gluten-free dough that falls apart like my willpower at a bakery.
Ever felt that struggle? These cookies fix that.
They’re rich, minty, soft in the middle, and ridiculously easy to make — like, “I can do this half-asleep” easy.
And FYI, I’ve tested them on both gluten-loving friends and those who avoid gluten like it’s a suspicious email link. Everyone devoured them.
Why Gluten Free Chocolate Peppermint Cookies Hit Different

You know how some gluten-free cookies turn out dry enough to file your nails?
Yeah… not these. I made sure the texture stays soft, fudgy, and full of bold chocolate flavor.
Ever wondered why mint and chocolate feel like the power couple of December?
Something about that cool peppermint spark hitting warm cocoa just works.
And IMO, peppermint gives chocolate a personality boost it didn’t know it needed.
I also love how simple tools make this recipe even easier.
I always grab my silicone spatula because it scrapes every bit of batter (waste nothing!), and a good cookie scoop keeps all cookies the same size.
Perfect for gift bags if you’re trying to look “effortlessly put together,” even if you’re baking in pajamas.
Ingredients You’ll Need (and Why They Matter)
Let’s break down the essentials because ingredients can make or break gluten-free baking.
Ever accidentally bought the wrong flour blend and ended up with hockey pucks? Same.
Dry Ingredients
- Gluten-free all-purpose flour blend (with xanthan gum)
This keeps the cookies chewy and not crumbly. I’ve tested no-gum blends, and trust me, they turn the cookies into dusty sadness. - Unsweetened cocoa powder
Go for high quality if you want deep chocolate flavor. - Baking soda
Helps the cookies rise just enough to stay soft. - Salt
Enhances flavor, and yes, you really notice the difference.
Wet Ingredients
- Unsalted butter
Melted butter adds richness and helps keep the center fudgy. - Brown sugar + granulated sugar
This combo creates that dreamy chewy edge. - Egg
Holds everything together while adding moisture. - Peppermint extract
Start small — this stuff goes from refreshing to toothpaste shock very fast. - Chocolate chips
I always use mini ones for the perfect melt, but you can use chunks if you want drama.
Toppings
- Crushed peppermint candy or candy canes
Adds crunch and sparkle. It also makes the cookies look store-bought fancy without the store-bought price.
How to Make Gluten Free Chocolate Peppermint Cookies
You’ll breeze through this recipe even if your kitchen looks like organized chaos, like mine on baking days.
1. Mix the dry ingredients
Grab a bowl you actually like using — baking feels better with cute tools, right? Whisk your gluten-free flour, cocoa powder, baking soda, and salt. I prefer using a sturdy hand whisk because it keeps everything fluffy.
2. Combine the wet ingredients
In another bowl, stir the melted butter, brown sugar, and white sugar until the mixture shines. Add the egg and peppermint extract. Ever noticed how butter and sugar smell instantly calming? Someone should bottle that scent.
3. Bring the magic together
Pour the dry mix into the wet mix and stir until you get a thick chocolate dough. Fold in the chocolate chips using a silicone spatula — honestly one of my favorite tools because it never misses a spot.
4. Scoop the dough
Use a cookie scoop (seriously, life-changing kitchen tool) to form evenly sized balls. Even baking = happier cookies.
5. Add crushed peppermint
Sprinkle peppermint chips on top before baking. Not after. Before. They stick better and look prettier.
6. Bake
Bake at 350°F (177°C) for 9–12 minutes. The centers should look slightly soft. Pull them out anyway. Underbaking gives you that fudgy middle that makes people “accidentally” eat four at once.
7. Cool
Let them sit on the sheet pan for five minutes. Then move them to a cooling rack so they don’t steam themselves into soggy disappointment.
Tips to Make These Cookies Absolutely Perfect
You know when you try a recipe online and think, “This could’ve been better”? I’ve done the testing so you don’t have to.
Use the right gluten-free flour
Not all blends work the same way. Choose a measure-for-measure blend with xanthan gum already included.
If your flour doesn’t have gum, add a bit yourself or the cookies crumble faster than a toddler’s patience.
Don’t skip the chilling (optional but recommended)
If your dough feels too soft, chill it for 20–30 minutes. This helps the cookies hold shape and prevents extra spreading. Ever watched cookies spread until they look like sad pancakes? Chilling fixes that.
Crush your peppermint finer than you think
Large chunks can melt weirdly or create sharp pieces. I use a small grinder to pulse the candy canes into perfect bits. Yes, grinders aren’t just for spices. Who knew?
Bake with parchment paper
This keeps the bottoms from burning and makes cleanup ridiculously easy. Less cleaning = more cookie eating.
Why These Cookies Make the Perfect Holiday Treat
Let’s be honest — holiday baking can feel chaotic.
You try to impress everyone with complicated desserts while juggling shopping, cooking, and trying not to burn out. These cookies solve that.
Fast and Low-Stress
You can whip them up in under 30 minutes. No chill time required (unless you want to). Everything mixes in two bowls. Even if your kitchen tools are limited, you only need basics:
- Whisk
- Mixing bowls
- Cookie scoop (optional but amazing)
- Sheet pan
- Cooling rack
Great for Gifting
These cookies look gorgeous with crushed peppermint on top. Pop them in a festive box or bag, and boom — instant impressive gift.
Perfect for Gluten-Free Guests
Ever had someone say, “Oh, I’m gluten-free,” after you finished baking something wheat-filled? With these on hand, you always have a treat ready for everyone.
They Freeze Beautifully
Make a double batch and freeze the dough balls on a tray. Once they’re solid, store them in a container. Fresh cookies anytime? Yes please.
Variations You’ll Love
Want to tweak the recipe a bit? I got you.
Make Them Extra Chocolaty
Add ½ cup extra chocolate chips. Or swirl in melted white chocolate for that cute candy-cane look.
Add a Peppermint Chocolate Drizzle
Melt chocolate and add a drop of peppermint extract. Use a piping bag or a simple sandwich bag with a tiny hole to drizzle. Makes them Instagram-worthy instantly.
Turn Them Into Cookie Sandwiches
Spread peppermint buttercream between two cookies. Suddenly, you created a bakery-level treat without the bakery-level stress.
Add Crushed Oreos (Gluten-Free)
Yes, this works. Yes, it’s amazing. Just fold them in gently.
Frequently Asked Questions
Can I use almond flour instead of gluten-free all-purpose flour?
Not for this recipe. Almond flour behaves differently and makes the cookies overly soft. You want structure here.
Can I make these dairy-free?
Yep! Use dairy-free butter and chocolate chips. The texture stays pretty close to the original.
Can I lower the sugar?
You can reduce each sugar type by 2–3 tablespoons, but dropping too much changes the cookie structure.
How long do they stay fresh?
They stay soft for 3–4 days in an airtight container. Honestly, they rarely last that long.
Why You’ll Keep Making These Cookies Every Year
I keep this recipe in my yearly holiday rotation because it checks every box:
- Easy
- Mess-free
- Holiday-approved
- Crowd-pleasing
- Gluten-free without tasting gluten-free
Plus, I love any recipe that lets me use fun kitchen tools without needing a culinary degree.
My stand mixer, cooling rack, and fancy cookie scoop always feel like VIP guests during cookie season.
And between us… nothing beats the smell of chocolate and peppermint flowing through the kitchen. Even the Grinch would soften up.
Final Thoughts
These Gluten Free Chocolate Peppermint Cookies mix holiday joy with simple, stress-free baking.
You get bold chocolate flavor, refreshing peppermint, and a chewy texture that actually feels indulgent — all without gluten holding you back.
So grab your mixing bowls, warm up that oven, and treat yourself to a batch.
Trust me, one bite will convince you to make these every December.
And probably January. And maybe February too, because who follows rules anyway?
If you bake them, save a few for yourself first — people tend to grab them faster than you can say “Wait, those are gluten-free?”